Preview view
The outline view is similar but shows the current pose rather than showing animations.
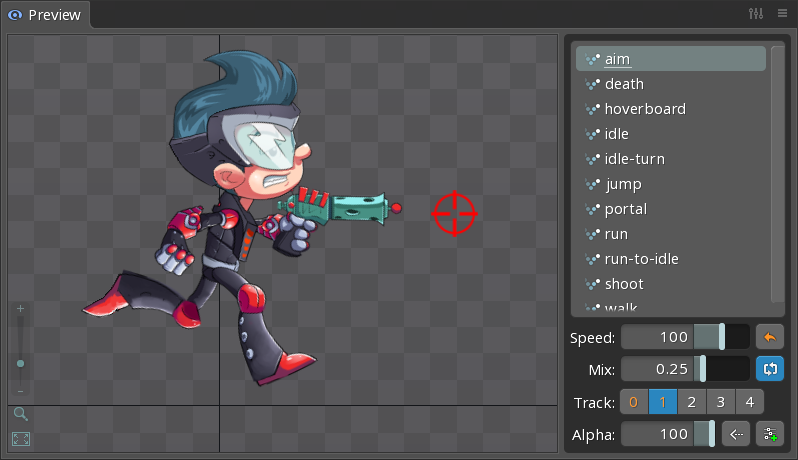
The preview view allows animations to be played using many of the same controls that are available at runtime. This includes mixing (crossfading) between animations, playing multiple animations at the same time on different tracks, and combining animations additively. The preview view is also useful to see an animation playing while editing the setup pose or animation.

The preview view works the same as the viewport. Use the right mouse button or hotkeys to pan. Mouse wheel or use the zoom slider, buttons, or hotkeys to zoom.
See the preview tips for various ways to use the preview view efficiently.
Animations
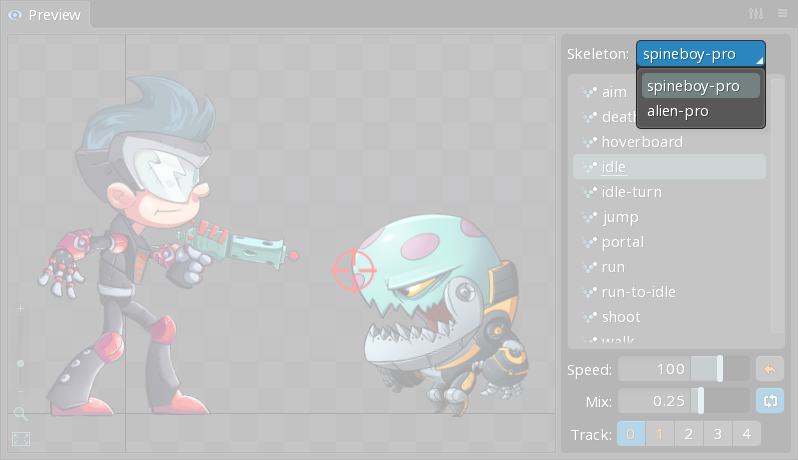
At the top right of the preview view, all animations are listed for the currently selected skeleton, just as they appear in the tree. If a project has multiple skeletons, a select box indicates for which skeleton the animations are being shown.

Right click a track button to toggle the animation for that track.
Clicking an animation sets the animation for the active track, equivalent to AnimationState setAnimation at runtime. See AnimationState playback for more information.
Clicking the animation again clears the animation for the track, equivalent to AnimationState setEmptyAnimation at runtime. See empty animations for more information.
Right clicking an animation selects it in the tree.
Tracks
Tracks allow multiple animations to be applied at the same time. See AnimationState tracks for more information.
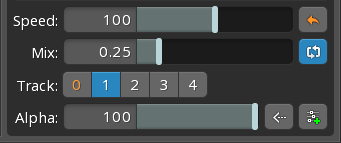
The track controls are shown at the bottom right of the preview view.

The repeat, hold previous, and additive buttons don't affect the currently playing animation. Instead, they affect the next animation that is played.
The track buttons control which track is active. The other controls show the settings for the active track.
Right click a track button to toggle the animation for that track.
The alpha slider, hold previous button, and additive button are not visible for track 0.
If an animation is set for the last track, another row of tracks will appear (up to 15 tracks).
Speed
The speed slider sets the speed of animations played on the track. It is equivalent to TrackEntry timeScale at runtime.

The speed slider can be useful to slow the animation so it is easier to see if it looks as desired, or to choose a speed that will be used at runtime.
The reset button sets the speed to 100%.
Mix
The mix slider sets the mix duration when the current animation changes for the track. It is equivalent to TrackEntry mixDuration at runtime. See mix times for more information.

When the animation changes for the track, the mix duration crossfades from the old animation to the new animation. Set the mix duration to 0 to make the animation change instantaneous.
The preview view is useful to determine the ideal mix durations between various animation that will be used at runtime. See AnimationStateData setMix.
Repeat
The repeat button sets whether the next animation played on the track will loop. It does not affect the currently playing animation. It is equivalent to TrackEntry loop at runtime.
Alpha
The alpha slider mixes the pose from the animation currently playing on the track with the pose from animations on lower tracks. It is equivalent to TrackEntry alpha at runtime.

When the alpha is 0, this animation has no effect on the pose from lower tracks. When the alpha is 1, the pose from lower tracks is overwritten with this animation. Between 0 and 1 results in a pose between the lower tracks and this animation.
Hold previous

The hold previous button sets whether the next animation played on the track will use the "hold previous" feature, which is used to prevent "dipping" when the animation changes. It does not affect the currently playing animation. It is equivalent to TrackEntry holdPrevious at runtime.
Usually, mixing between animations that key the same property works as you'd expect. However, when a lower track keys the property, the pose from the lower track can be seen when mixing between animations on a higher track. If this is undesireable, Hold Previous can be used.
Normally the previous animation mixes out as the next animation mixes in. With Hold Previous, the previous animation is applied fully while the next animation is mixed in. This ensures the pose from the lower track won't be seen.
Note that since the previous animation is not mixed out when Hold Previous is enabled, the next animation should key every property the previous animation keys, else the values will snap to the setup pose when the mix completes.
Additive

The additive button sets whether the next animation played on the track will use the "additive" feature, which adds the animation's pose to the pose from animations on lower tracks. It does not affect the currently playing animation. It is equivalent to setting TrackEntry mixBlend to MixBlend add at runtime.
The values for a pose from an animation are normally added to the setup pose to get the final pose used for the skeleton. When additive is active, the values are instead added to the pose from animations on lower tracks. Typically the alpha slider is used to control how much of the additive animation is added.
View settings

Hide controls
When checked, the list of animations and playback controls are hidden.
Play current animation
When checked, the preview view will automatically play the active animation. This can save time when using the preview view to show the active animation.
Show bones
When checked, bones are displayed inside the preview view.
